Store bought sketch books?

August 31, 2012

... where I'm going I don't need, Store bought sketch books (points for the reference).

Made my own sketchbook. Made a stack of various surface-types and colors of paper about an inch thick, 8.5x5.5 - clamped them together, drilled holes, threaded a few laps with a needle and thread and sealed it off with masking tape. Cut out a cardboard cover to wrap it in and connect to it and vwalla... as good if not better than any craft store or walmart sketchbook.

Its superior because the cardboard cover lets me decorate/ draw on it however i wish. The pages offer coverstock thickness, to laser printer paper thickness, as well as colored fax paper thicknesses for some variation fun :) 

And I will be installing a pocket on the inside of the front cover per my new norm. Whats not to like?

Lava Turtle Shell Shield Token Walkthrough

August 30, 2012

This look at my process follows a job I just finished up earlier today. It was something new for me as I had never really done card game art before but the client came to me wanting my art style so I approached it as a one character with background and original design project. Instead of a character it was an object, but I find most any 'object' is best dealt with if you treat it like a character. Make it your own, find your own look, and have fun with it. This comes into play most importantly later on. Enjoy! Any questions on this post will be answered as soon as I can, I hope somebody learns something, or at least potential customers see what I do, and know how much work goes into stuff sometimes. In this case, there's a lot of baby steps to get it right.

So the brief was for a 'Token' card design for role playing card games like Magic The Gathering or so forth. The idea was this is a special token card somebody might get after defeating this turtle character in this image which was provided for reference below. Its got flaming/lava style cracks along its shell and seems to breathe fire like a dragon. When a person defeats one or what not, this card would in some cases be aquired and the shell is now available as a shield.


In doing the proof I went with my immediate mental image of the shield hidden/ cast aside from plain site left abandoned along a rocky hill or landscape in general. I did this rough color mockup of what I had in mind. The client approved but stressed 'must be much much brighter'. I took this to mean in general don't make it too shadowy and what not. So I proceed....


I started rendering the background first, using photoshop brush tool to paint the rocky landscape, then inked the shell with brush and tried to make the texture resemble that reference image at the beginning. I was hating how the shape looked and how it over all was coming out. Just didnt pop to me at all. I looked through other token cards and realized they're supposed to be prizes, and advantages to obtain over other players. Should really be something awesome. This just didnt seem awesome.


I realized I was being far too uptight and trying to do a 'magic the gathering' type style that just wasnt MY style. The best way to describe this stage after an hour of work above there, was 'in over thinking this and studying all the examples out there i've become way too uptight... i've got to have fun with this' 
So I decide to take a way more stylized approach. The clients words '...you don't have to stick to the style of this example or any of the other cards, we like your style and want you to do whatever you like as far as the look. It just needs to look like something a player can use as a sheild..' So after an hour - hour and half of work, I totaly saved it, closed it. And started over. Enter, attempt 2!
This was as far as i took the pencils of the new design. Blocked out the shape, the angle and the spikes.
I immediatly proceeded to ink over that loose sketch with vector objects and photoshop pen tool (as i typicaly do with my inks) and had fu creating texture with pentagon and circle objects spattered about. Loving this already, the graffiti-style look and the bold design. Looks like the tutle shell in the reference picture but is like in a video game where it magicaly becomes an item of use!
For this walk through I've turned off that black ink layer, and showing the green layer underneith, with an orange layer above that and a yellow layer above that.
Selecting the green layer only I create a new layer and use a 90% opacity angled brush tool for the shading to create texture. Keeping in mind the light source is above and the spikes will cast a shadow on the green shell arts below. This layer is set to multiply, and the opacity is adjusted to how dark i want the shadows to be.
I also then create yet another layer above that and use the same brush tool but with white to create highlight areas. Keeping in mind in both instances the angular and round shapes of the shell. Where light falls most directly, casts slightly, and the shading where light barely reaches.

here I've turned the lineart layer back on over the color layers. On a new layer above all the colors and lineart, I have selected both the green fill layer and the lineart layer together, so that i have a nice selection of the entire object. In the new layer (above the lineart layer) I use the same color as the orange in the lava, and use a low opacity airbrush and spray along the streams of lava, and let some of the orange gradient go up into the shadows of the spikes. Not worrying if I get the orange too thick at any one area, I deselect everything, and set this new layer with the orange airbrushing to 'Hard Light', and lower the opacity so its a very subtle glow from the lava casting a light upon the spikes. Notice because we selected the whole object, the gradient stays within the bounds of the object. So there we are with a finished spiked lava turtle shell shield. Onto the background


All the layers for the shield are in their own folder set. I have it minimized and locked. 
I select the whole object and make a new layer in a new folder set called 'background' and fill it with black. Then deselect it and go to filter and gaussian blur, make it blurred but not too diffused, i want the effect that the shield is just barely hovering off the ground. I make a new layer below that, and fill it with a nice earthy/base color. Going to be doing lava, so have a brown/ redish color thingy there.


A nice collection of textures and effect objects are always nice to keep handy, but if you need somethign specific and dont have it, a quick google search for 'item-type texture' always brings up nice options. I found a good cracked earth texture, played with simplifying the number of colors and the levels to increase its contrast. I cut out some main veins in the texture that are the brightest, and set the rest back a little darker with the levels tool. Now you should see by selecting certain areas and deleting them, the original base color we did before comes through.


(Ignore the shell as it has several layers turned off during this process for no reason particular) - I select that textured area, which will automaticaly have the cutout areas deselected, I make a new layer, fill it with more earthy color. Leave it set to normal, but turn back to opacity just enough to see a little texture coming through. So its subtle but really starts to make it look earthy. How much or how little at this point is up to you. I also add a layer between the texture, and the base color below it, and by hand paint in with a hard brush tool oranges and yellow currents of lava.


Now I've made another layer ontop of the previous cutout color layer that was set overtop the texture, and set it to multiply to darken the ground, and make the lava we just drew pop out more. I then make a new layer overtop of this one, and using a 65-100 airbrush on 50% opacity i spray the same lava orange color over all the cut out areas that show the lava through the earthy colors and textures we have been putting down. Airbrush the orange on nice and thick and make sure to follow the cracks shapes so theres no mistaking its eminating from them, and that this glow will not necessarily cover all the ground. Set this layer to  hard light and knock it back to at least 15% then see where you like it for a subtle glow. You'll notice it makes that lava really bright and poppin. The darker earth that we created before makes it pop that much more.


To push the busy background back more and put focus on the shell shield which is the focus of this whole piece, I use gradient tool and make what i call a 'black fade'. Compmletely blackest on the edges and then gradualy getting brighter till its not darkening anything towards the edges of the object/ character of focus. Set this to multiply. Might have to play a bit with where the gradient starts and stops to allow enough background through.


Now a really cool effect to finish this thing off is to then fill a layer overtop that black fade layer with (in this case) the lava red orange color we've been using. In this case I even chose one that was far more on the red side. And set it to 'overlay'. It'll bring out anything that's not completely blacked out and in this case, with the order of layers and layer modes we set, will make the veins of lava pop from the black fade areas. Looks a little Diablo III style doesn't it? That lava shell shield looks right at home with that volcanic environment.

At this point I was sure the client would love it and sent them the finished art. They did love it but didn't like the black background enveloping everything and it didn't look enough like ground to them. Also wanted a little more contrast between ground a character could actually walk on and the veins of lava. OK, so after thinking about what they were talking about a bit... I made some adjustments... and for their purposes, all though I love the boldness of the original, I think this one does definitely work better for their needs.


So right away, you can tell I turned back the black fade wayyy down, but still wanted it to darken the edges and put the focus on the center. I then made a new layer over the previous glowing layer for the lava cracks, and with pen tool made jacket quick selections of all the ground areas between the veins of lava. I filled these layers with brown but it was a bit too crisp and clean.


At this point I used a bevel layer style and messed with the highlights and shadows and depth till i got this new brown jagged earth layer where i wanted it. I set the overall oopacity of this layer back until i got enough of the original lava glow and texture eminating through. And even topped off the whole thing with a top-most layer with abit of yellow/orange glow that i airbrushed under the shell and did a gaussian blur on to really blow out the glow, and set back to opacity with 'hard light' setting. This really in the end knocks the lava down below the ground a good bit more and gives teh sense of actual earth to stand on. And the extra backlit effect on the shield makes it a little more powerful seeming and special when a player receives the token. All in all, I'm happy with the final result as well as the original pre-client change. They both have very different feels but ultimately this final design will make for the best card for the clients purposes.

Well, that was a book, I hope somebody enjoyed reading about this, and I hope the steps involved were clear. Was fun doing some RPG card art and i look forward to more.

As I said in the beginning of this walkthrough, any questions this tutorial has raised I will gladly answer if you will ask it in the comments below :) Thank you

$20 Dollar Slots Are Back

My Spidey Sampler is tingling!

$20 Slot Commissions are back! - Get a waste-up rendition of your original character or fan character (from any existing comic, animation or video game) for $20. This sampler of spidey shows what you'll get with the new style of $20 commissions, available all September long!

  • Check the Deviant Art journal for availability, as well as twitter/facebook for announcements of available slots. 
  • You wil receive some originaly drawn and colored art by Eryck Webb for only $20 on the day of the slot you purchase. 
  • Buy several, if theres no more slots on a given week, you'll be put on thet next available week. 
  • Paypal 21.00 to eryckwebb3@yahoo.com or just 20.00 and pay the paypal fee. 
  • Existing picture references only, no written descriptions or character designs. 
  • DA Journal: eryckwebbgraphics.deviantart.com/journal


PreLaborDay Gameplan

August 29, 2012

This has been a tough week with mandatory errands like vehicle registration stuff which took better half of a day, battery dying in a parking lot, and also helping the wife with medical related visits and errands. So I apologize to any clients out there who are finding their orders be behind a day or two. That being said, I also had already planned to do a 4 day vacation this Labor Day weekend, and as it is much needed, will be taking it. So I will not be in to answer emails etc Friday the 31st till after Labor Day (Tuesday). The one or two jobs that absolutely no-question must get out this week I will have done tomorrow, all others I will pick up where I have left off after the weekend. Including Delusions of Normalsy which will wrap up release Tuesday. Thank you for your patience, and remember. If you have a pressing deadline and a hard press date to make or anything like that, purchase the rush order, or please be patient. Thank you!

On a seperate note, I am looking forward to EWG's Rockabilly Zombie Queen exhibition piece being published exclusively in 'Zombook' by Graffito Books, comes out September 3rd! Mark your calenders and place your orders!

Daily Sketch - 8292012 - Wolverine

Daily Sketch - A daily attempt at meditation and experimentation and stayin loose w/ the ol' arts by taking time each day, to sketch whatever the $@#! i want. 

This doubles as a contribution to this weeks theme over at the comic art alliance of 'Xmen'. This is fun and loose and what not. I'm feeling the need to do the CCA theme a couple times in different styles.

In this case I got wolverine perched on a chimney of some sort smoke billowing around him in a town that seems to be japanese buildings with modern heating... hmmm.... lol
was just playing with the smoke/ negative space/ lighting.

Daily Sketch - 8282012 - Chelios

August 28, 2012


Daily Sketch - my attempt at continued growth and discipline in my art form through experimentation, and meditation on a daily basis :) 
For todays 'Daily Sketch' I had a notion to sketch up some Frank from Transporter. Well, then I realized in a grand realization I didn't want to draw Frank from Transporter... I had a calling, and the calling said 'CHELIOS.' Used some google images for reference. The one and only CHELIOS. Chev is the man who can not die, played by Jason crazyman Statham of course. In any case I wanted it to look like Statham, but be the character. 

C.A.T's First Single! Featuring EWG Cover Art

 Well, its out! The first single from Continuous Audio Transmission featuring cover art with comic-style caricatures of the band and their broadcast tower logo in the back. And theres a cloud in the sky that has a striking resemblence to a certain mascot... I wish nothing but success to CAT on their first release and the album to come!

These guys sample tunes rock hard, and I know if you like rock at all you'll love this. Go give them a listen!
http://www.cdbaby.com/Artist/ContinuousAudioTransmission

Todays Bidnass

August 27, 2012

Using today as a day off from art production and taking care of some business end things, record keeping what have you. Need the day off in general, and will be hopping back on the production train and getting people waiting for their orders taken care of starting tomorrow. See you then.

Daily Sketch - 82712 - Leonrado


Daily Sketch - attempting to make a daily habit of sketching and exploring my creative past, present and future. Also... its good practice, especialy on days when I'm  not working on anything and need to keep the skills loose :) 
Leonardo from the Teenage Mutant Ninja Turtles, also found here http://eryckwebbgraphics.deviantart.com/art/Daily-Sketch-8272012-Leonardo-323734472 - yep, don't think i'd be doing what I'm doing today, heck, probably wouldn't be filling a sketchbook-a-year if it weren't for these heroes in green inspiring me back in third grade as hard as they did.


Daily Sketch - Sunday 82612 - Spidey

August 26, 2012

Daily Sketch
In an effort to stay loose even on days I'm not doing work, do a little sketching for myself, anything/ everything/ whatever strikes the ol' fancy.

In this case, Spiderman

Lastnight (Thats what she said)

August 22, 2012

Just a funny thing that occurred lastnight. As you often do in the creative world, whether it be building custom cars like on Street Customs, or building bikes like over at OCC, or cranking out pages for a tight BIG 3 deadline, I was pullin a late night lastnight. I was having fun doing so, haven't successfuly been able to do that without falling asleep in a while. But lastnight, I had some good momentum, a fresh cup of coffee, some Sheavy to keep me rockin through the night, and the windows/ screen door were lettin in some great cool air (yay for cooler weather lately). I was determined to play catchup and was making good process, then I got to a point where photoshop started hosing up on me, and not acting right, so i restarted it, and it still was doing it, so i had to restart the computer, and it wouldnt 'restart' without having a big ol 'eh, windows explorer doesnt' like you' moment. So, I finaly decided 'well, I'm at a point where it'll take me 15 minutes in the morning to finish this and i'll send it out then start tomorrow's work' - so finaly 1 am said screw it, i'm going to bed. The late night of extra work definitly helped with production and get things done, but i can't help but wonder if i work too hard or too long of hours on a regular basis, when even my computer is calling it a night and i'm still trying to get things done :) Needless to say, this morning woke up good to go and got it done, but thought that was funny. The one night I am up and doing good with some late night working and my computer is like 'no no no, not tonight. mm mm, not going to happen'.

~Anywho, back to woikin! Got an hour to get stuff cranked out before lunch. I'm feeling a big chunky salad...

Soldier Boy's Descent Case Study

August 21, 2012


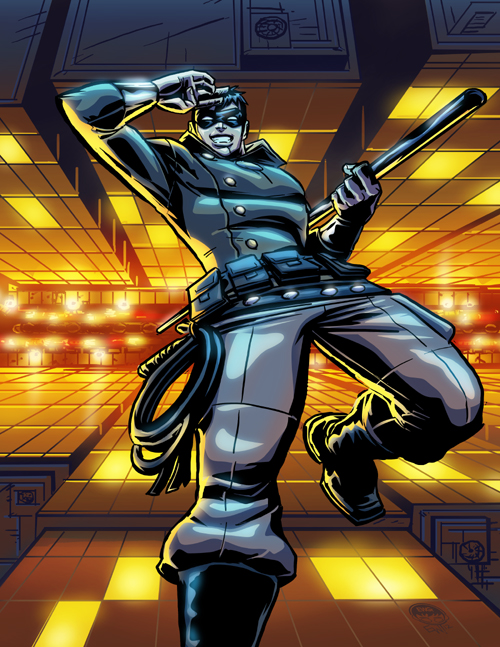
Presenting a quick case study of the process i went through to create this piece I've dubbed while working on it, "Soldier Boy's Descent", where he rebelliously jumps from the roof of a tall building to say 'see ya' to enemies who thought they otherwise had him. Or do a big splash exit after saving the night. Well heres how it went:

Started with 8.5x11 canvas per usual w/ .125 bleeds included (so a 8.75 x 11.25 canvas), sketched loosely figured out the perspective angle i wanted and the veneral pose/ layout.

Articulated some tight sketch enough to ink over and to send a proof to the customer, at this point i just blocked out the building to render in the inking stage.
Sketch approved I get inking, and knock the pencils to a very low-transparency and ink the character, using straight edge tool for big straight objects like this staff, and later the entire background

I make a quick fill mask of the figure so i know generaly his place over the background, and set that to very low transparency. With the figure inks turned off, i make a new layer, and render the background with pen tool and brush tools. The street level i purposely just suggest cars and a median with trees and light posts as the lack of articulation and detail simulates blurred focus putting more depth and focus on the figure.

I make a white flat layer behind the figure to seperate him from the background and later will use it to put colors behind the lineart. The figure and background are inked on different layers so i can later set the lineart of the background to a lighter color than black to make it set back and increase the depth as well as the focus on the character

Again, turning off the character ink lines and just using the flat color on a low opacity so that i can tell where he generaly was and not worry about spending a lot of time on details behind him, I make a layer under the background lineart and color it up! Good to use photo reference via google or what not to get it at least semi accurate. Little things like how theres a blunt end to the lighting from the street at the top edge of the building and it proceeds to reflect the sky not the street (hence the dark blue huges for the tops) and how in most photos, the contrast of any lights with the dark of the night causes it to bleed a bit and be extra 'glowy'. Also, a little reference for the movement of car head and taillights on low shutter speed was helpful.

Background done, I generaly know there will be orangy/yellowy light coming from the street and the moon lit lighting coming from the sky, so there are two sources of light to portray on the figure. I start by using that flat layer behind the figures lineart, and start seperating the flat colors of his jacket, pants, belts and boots and skin. Then on a layer above that i use an adjustment layer after selecting the entire figure, and fill it blue, and use layer modes to get a general desaturation effect that one gets at night, where colors are much more muted and almost black and white. I select areas that i want the shadows to fall on, using curves and being noteful of the shape of the object i'm doing the shading on. Then i add another layer overtop and select highlight areas from the street below, and another layer to do highlight areas of the moon light. I'll sometimes (as in this case) take one of the highlight layers and copy it, move it ontop of the lineart and set a gaussian blur to it to create a glow/ sheen effect. Play with the transparency at that point to get it as subtle or bold as you want. 

Turning the character and background lineart layers off and turning on all other layers is a good way to check for any color blemishes and check the lighting without the hard lines skewing the view of them. Everything looks good!

And here we have the finished art, at this point i save the psd version, then flatten it and save a jpg version, and then i have an action set to crop to an even 8.5x11 from all sides, (trimming off the bleed) and its ready to send to the customer! I also have an action set to save a lowres 500px wide 72dpi which i use for anything i'm going to post online on deviant art or this website.

Hope you enjoyed this casestudy, and walk through. Maybe you learned something? Maybe not? Anyways thank you for looking and taking the time to study it a little :) I appreciate the interest in what I do!

AM Warmup 8212012

For the All Tooned Up art group theme this month. Two themes, batman villains and venture bros, decided to do some Brock Samson from venture bros. hes always fighting some big beast with a knife. Gotta love him! This was 15-20 min so didn't really finish out beyond this. Still, was fun. On to finish some client work rest of the day!

Joe Kubert Tribute - TOR artwork by Eryck Webb

August 18, 2012


Originaly posted at the art group I enjoy participating in as often as possible, The Comic Art Alliance. This week's theme is tribute to the legend Joe Kubert whom just passed away this past month. I can say I've always found his work even though sometimes very loose, to have masterful technique in his storytelling and a certian fluidity to his work as well. Loved the way he drew faces and hands too. Well here is one of his intellectual properties he did many stories of over his years, TOR the caveman type character published I believe by DC comics or something like that. Reminds me of a tarzan type character, except with cool long triangle shaped hair and more hide on his arms and actual boots. Plus bonus caveman tools for hutning and clobbering. BONUS! This is also the first piece I worked on/ finished on my new Dell 24'' screen that tilts verticly allowing awesome massive close up into my work and makes working on verticle pieces a pure delight as its not cropped by a horizontal screen but you can see top to bottom way more. Great for pages, single panels and verticle character works! Barely scratching the surface in using it as I just got it as an early birthday present this week, but so far thrilled with it. Here is in continuing this tribute piece, and for those who come see this art on my blog, a look at the process. The original loose sketch, the loose but more definitive pencils over top, and the inks straight over top. I did it in my own style but tried to channel some joe kubert in the inks with a angled calligraphic brush instead of a normal round brush. Gave it a cool aesthetic. But still doesn't beat the inking i've been doing lately in Inkscape, and its FULLY tunable brushes. Enjoy, and heres to Joe Kubert... a legend and inspiration. I'm glad I can say I've read a few of your Tarzan comics, studied your work through searching for it through google, and even visited the Joe Kubert school when I was looking at colleges back in the day. He is a great loss to the cartooning/ comic community but I know his two sons are already working hard to carry on the mad comic skills.

~Eryck

Loose sketch to get the posture/ attitude/ form down

Tighter pencils, just fleshing out enough to ink over, not finished pencils by any means!


The inks w/ black fills by themself!

Then felt like doing some blue hue colors for the 'colors' Finished version at top :) Thanks for looking

Done in tirbute to JK and for CCA

Todays $20 commish - Sovereign Fist

August 7, 2012


Sovereign Fist commission, for todays slot commissioned by  Pooshun. For those who did not see the livestream session which is about an hour long start to finish, you can watch the recorded video from when I did multiple sketches to get a feel for the character and what pose would work best with his aesthetics (had to based everything else on those arm gear and helmet of course! its his main aesthetic feature!) and then watch it immerge to finished art in about an hour.

See you tomorrow for tomorrow's 20 commission slot which I will broadcast on livestream just like this one which can be viewed here:


Watch live streaming video from eryckwebbgraphicsart at livestream.com

C.A.T Mascot Horizontal Finished

Got the production on this mascot design for the band Continuous Audio Transmission completed. All vector via photoshop object drawing and masks, pdf looks perfect no matter how far i zoom in and print test came out perfect too. Looks crispy! A new landmark in technique and graphic level for EWG for sure! Lunch and then character commissinos rest of the afternoon. Good stuff. Check out CAT's stuff, info and music samples here


April O Neil Ghost Buster Start to Finish on Livestream

August 6, 2012


Did tonight's $20 commission live on livestream. Was of a Ghostbusters Original Character of the customer's that was cosplaying as April O Neil from the 80s TMNT cartoon, but had to go on a mission with no time to change so it looks like April Oneil is a ghost buster hehe. Fun combo to do. Thanks for those who came out to watch, saw ya in there. And for those who didn't heres the recorded session. From starting sketch to finished colors/ effects and color tweakings. Enjoy!


Zombie Reader - Finished Commission

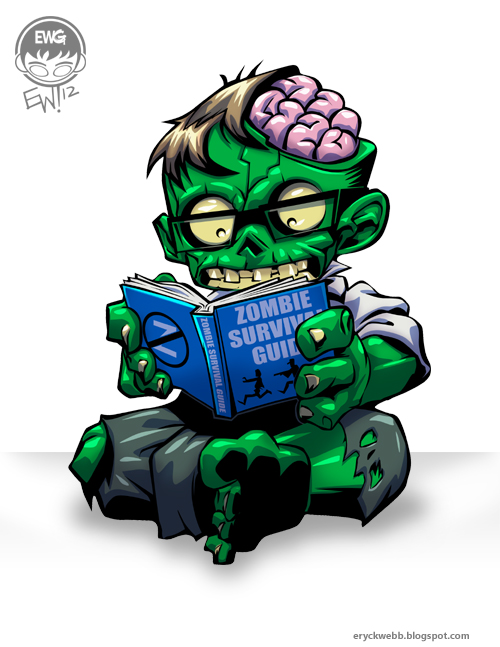
Fun character art commission of a zombie reader, w/ some freedom to design the zombie as long as it was reading a 'zombie survival handbook' looked a bit nerdy and had some brain showing to show he was smart. Apparently a literate zombie! Did it in vector (completely vector, even the shades... new technique i just figured out) in photoshop, i have inkscape which i used to use a lot but i find it very counter intuitive and using objects in photoshop and saving out as vector data works SO much better. Lossless gradients and highlights and shadows and line edges baby. Anywho... fun stuff! Done for today. Going to get the wifey from work and stuff. Will do today's $20 commission later tonight.

So you want an outline of my logo commission process....

August 2, 2012


So, heres a new one. Somebody before jumping in wanted to know about my whole process, SURE mister. Be happy to relay that to you. So you can either copy what I'm doing in your own business or waste my time typing it out and probably not even buy anything at the end anyways. HAPPY TO HELP! But heres hoping he decides the water isn't too fridged and if he has a clue what he wants for a logo specificly then I'll be happy to help.
Howdy, I'm interested in potentially having you design a logo for me. I was wondering if, before I decide, you could walk me through your design process in terms of my input and the # of variations you may design. Best, Jeremy
So I replied, with this break down, which covers all the important points, and hopefuly this will be useful for anybody else looking to have a logo done and wondering how it works. Cause I'm sure most people think ' i toss my moneys in the wishing well called 'paypal' and hope my finished perfect magical logo will appear to me under my pillow tonight!'
1. You pay 45.00 which i invoice from paypal, and then you pay +2.00 paypal fee 
2. You tell me what your looking for on your logo, symbols that represent the org the logo is for, as well as the name of the org 
3. In about one week I shoot you 3 solid varying ideas. in black and white unless you have specific colors locked down and i will do them in those colors from the start
4. color variations to lock down colors with the one you picked to continue with from the 3 ideas.
5. wrap it up i bundle files send to you.
6. if job is finished and you come back with changes post-sending files, i will bill you for 15.00 each time you do this.
7. if for some reason you hate the first three ideas, i will try again, and if you hate those, will try one more time before refunding your money and sending you on your way. 

Anywho, happy to break it down for any ol' customer out there. But just a few tips here... saying things in your introductory prospective contact email like 'how many variations are you willing to design' and 'potentially interested but before i decide i'm interested'.

Silly Bastards...

Comic Strip - 'Head Start'


A comic strip I thought of this morning, based on a true story. Alrighty, thought I'd share hehe.

Zombie Reader Pencils Proof

August 1, 2012

Well after doing the previous sketchy sketches here: http://eryckwebb.blogspot.com/2012/07/zombie-nerdy-bookworm-sketchin.html I tackled it again tonight in the sketchbook with traditional pencils and hacked out this little guy. I feel like, it could be taken further pose/ design wise. But I'm pretty content. I think I will call it a proof and it has been sent :)

C.A.T mascot and logo render work in progress


8/1/2012 - 4:45pm - Finished the 'transmission tower' for the Continuous Audio Transmission logo. Heres a close up shot with a nav panel shot of the whole thing on the side. Pending final approval but I think the guys will love it. Came out better (to me) than I imagined.

8/1/2012 - 230pm First look at a work in progress shot of very early rendering of the Continuous Audio Transmission mascot. A cyber cat that retains the same industrial feel of the rigging of their logo etc. Still a long way to go. Will be more details on the head etc. Making it absolutely perfect so may not get done today.

 
EryckWebbGraphics © 2013 | Base Template Designed by RumahDijual, in collaboration with Online Casino, Uncharted 3 and MW3 Forum
Design Modified and Adapted for Eryck Webb Graphics Website by Eryck Webb.